


Please read the whole post first before starting so you know what is involved and what to expect. This is also a good opportunity to clean up some of your brackets and such to make your engine bay look nicer. Also, please bear in mind your personal safety and that of others while doing things like working underneath a car, and dispose of any drained coolant properly.
Now on to the install.
Tools required:
• Jack
• 2 x Axle stands
• 10mm socket + ratchet or a wrench
• 4mm allen key
• Bucket
• Pliers or screwdriver for hose clamps
• Antifreeze and water
• Diagonal cutters
• Wire stripper
• Crimper
• Electrical tape/heat shrink
Parts required:
• Mizu radiator
• Mizu fan shroud
• 4 x screws (supplied with fan shroud)
• 4 x washers (supplied with fan shroud)
• 4 x lock washers (supplied with fan shroud)
• 2 x male 14-16 gauge bullet connectors
• 2 x female 14-16 gauge bullet connectors
First, disconnect the negative battery terminal, jack up the car and support it on axle stands.
Then, remove the splash shield beneath the car.

Figure 1 - Location of bolts to remove splash shield.
Next, grab a bucket and drain the radiator using the drain plug on the bottom of the radiator.
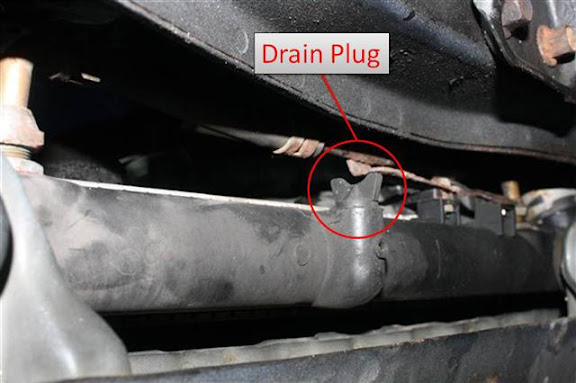
Figure 2 - Location of drain plug on bottom of radiator.
Once the radiator is drained, disconnect the two fan plugs.

Figure 3 - View from top, drivers side looking down.
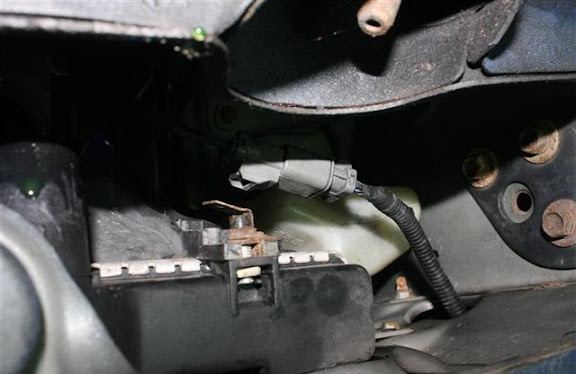
Figure 4 - View from underneath, passenger side looking up.
Now you can remove the upper and lower radiator hoses and the reservoir hose.
Next, remove the radiator upper brackets and AC line support. These are held on with 10mm bolts.

Figure 5 - Remove the two bolts holding on the radiator upper brackets.
You should now be able to lift the radiator out of the car. Once out, remove the two radiator cushions from the bottom.
Now it’s time to assemble the Mizu radiator.
Hold the fan shroud up to the radiator and attach it using the supplied hardware. The washer should be up against the fan shroud, with the lock washer between the regular washer and the screw. The screw is tightened with a 4mm allen wrench. Attach the old radiator cushions.

Figure 6 - Attach the fan shroud to the radiator.
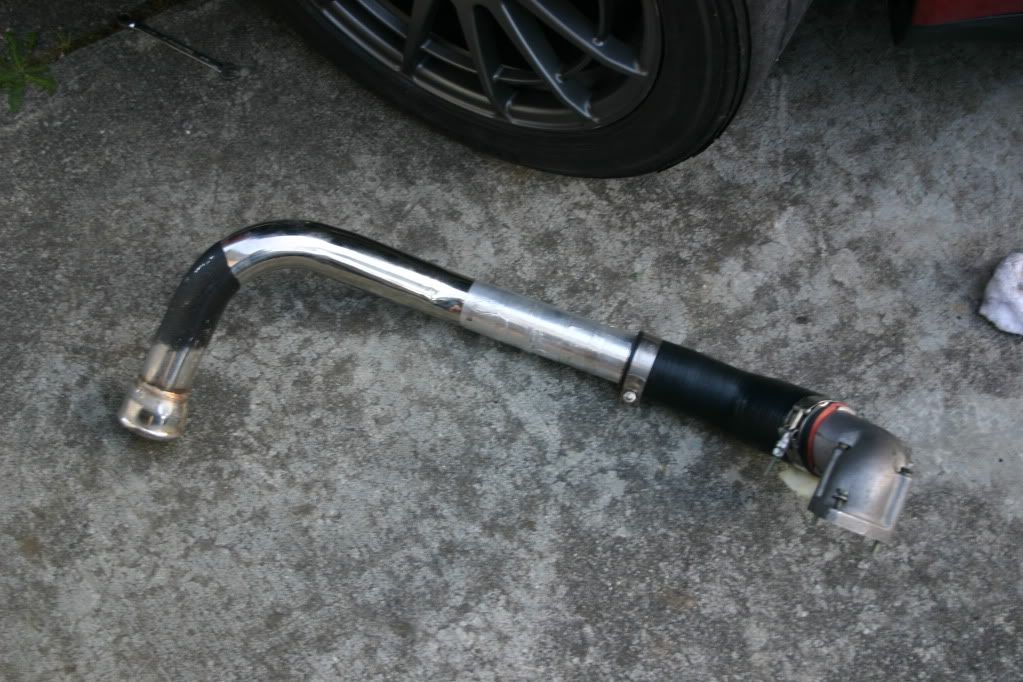
The supplied fan connectors do not work with the factory connector in the car, so you have a few options. You can either remove the plugs from the factory fans and the connectors from the Mizu fan wires and attach the factory plug to the Mizu fan wires -or- remove the plugs from the car and attach new connectors that will work with the Mizu fans. I chose the second option. Autozone sells bullet connectors that fit the connectors on the Mizu fans. You need the 14-16 gauge male and female bullet connectors.

Figure 7 - Bullet connectors.
Cut the factory fan connectors off and crimp on the new ones. The female bullet connector should go on the blue wire with a yellow stripe, and the male bullet connector should go on the ground (black) wire. Be sure to check that the wiring on your fans was the same as mine before proceeding. I put heat shrink over my connections to ensure a weather tight seal.

Figure 8 - New connectors on fan wires.
Lower the new radiator into the car, being careful not to damage the fins. The radiator cushions should fit into the radiator support in the car.

Figure 9 - Mizu radiator installed. View from underneath the car.
Now plug in both the fans and reconnect the upper, lower, and reservoir radiator hoses.


Figure 10 - Fans and hoses connected.
Now reattach the upper radiator brackets, AC line support, and the battery.

Figure 11 - Upper radiator brackets and AC line support installed.
Now it’s time to fill the radiator. Loosen the air bleed bolt in the thermostat housing. This is located near the intake manifold on the passenger side of the engine.
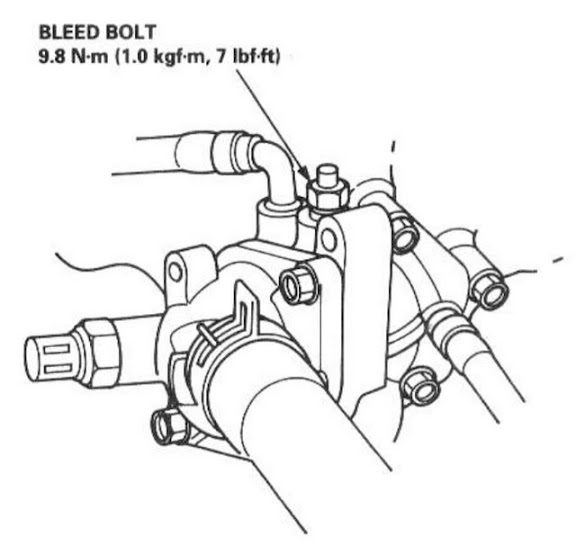
Figure 12 - Coolant bleed bolt.
Fill the radiator to the top of the filler neck with a 50/50 mix of antifreeze and water. Tighten the air bleed bolt as soon as a steady flow of coolant free of bubbles comes out.
The factory manual says to run the car with the cap off until the fans come on, and add more coolant if necessary. When the fans came on on my car the coolant came out of the filler neck, so I just ran the car with the cap on until it was warm, let the car cool, and then checked to see if the system required more coolant.
If it all works, you’re done!
 Enjoy your new Mizu cooling system!
Please let me know if all the pictures work and if the format is ok. What looks good on my laptop may not necessarily work for everyone else.
I was one of the lucky people selected to test out the Mizu radiator and shroud setup, thanks to the wonderful people at sparkplugs.com. Since my car is turbo'd, it presents a unique test bed compared to other Preludes and since it produces so much more heat, it should be a good candidate to put this radiator to the test. And without further ado...here is my install adventure
First, the test subject


Started by removing my upper charge piping since it runs across the radiator. This presents an issue I'll cover later


removing the lower t-bolt clamp

boom, pipe is out
dont want junk getting into the turbo. shop rag plug!

removing the first fan. I had previously removed my radiator bracket because it was in the way of the piping.

number 2

might as well start draining the coolant now

pulled the recovery tank out of the way so I could get to the fan plug


the lower rad hose was a bitch to get off...

...and then when it came off, coolant exploded everywhere lol.

oops...

just hose it off, no one will notice...

anyways... Removed the other radiator bracket
BOOM! top mount radiator!

aaaand the goodies!

The construction of this radiator is top notch. The welds are very nice, aside from some consistency issues, but thats what you get from hand-welded parts. Looks great though

I know Psud3ity posted about how the inside of his radiator necks werent too smooth. Mine did not have that problem. Great weld penetration, and very smooth


The shroud comes with a nice little hardware kit with washers, alock washers, and allen screws.


However...you dont use chamfered screws with lock washers...

Fortunately I have a bunch of miscellaneous fasteners so it was fine

First test fit...

Fits without the shroud, but the turbo coolant line was hitting the fan shroud when I tested that

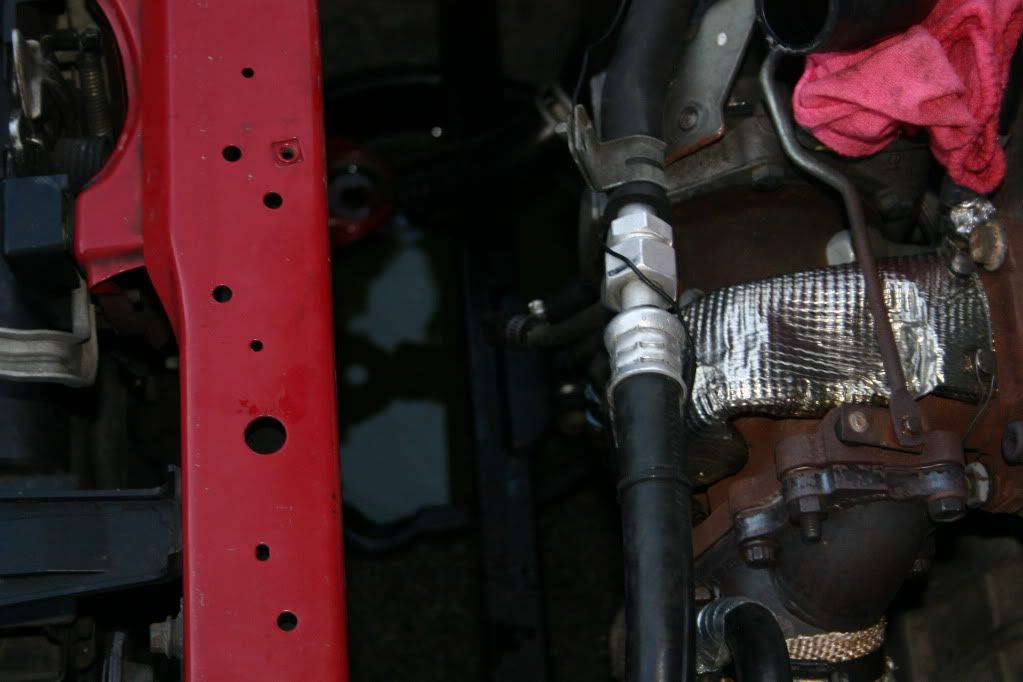
give it a little bend and rotate it a bit... better?


still didnt fit though... so I had to remove the hose and spill more coolant

flipped it around and ran it over the top and voila! it fits!


kinda close? haha


fortunately I have a ton of heat-shield tape that I have used with great success so far, so I will be using that to shield the plastic on the fan
And it's in!


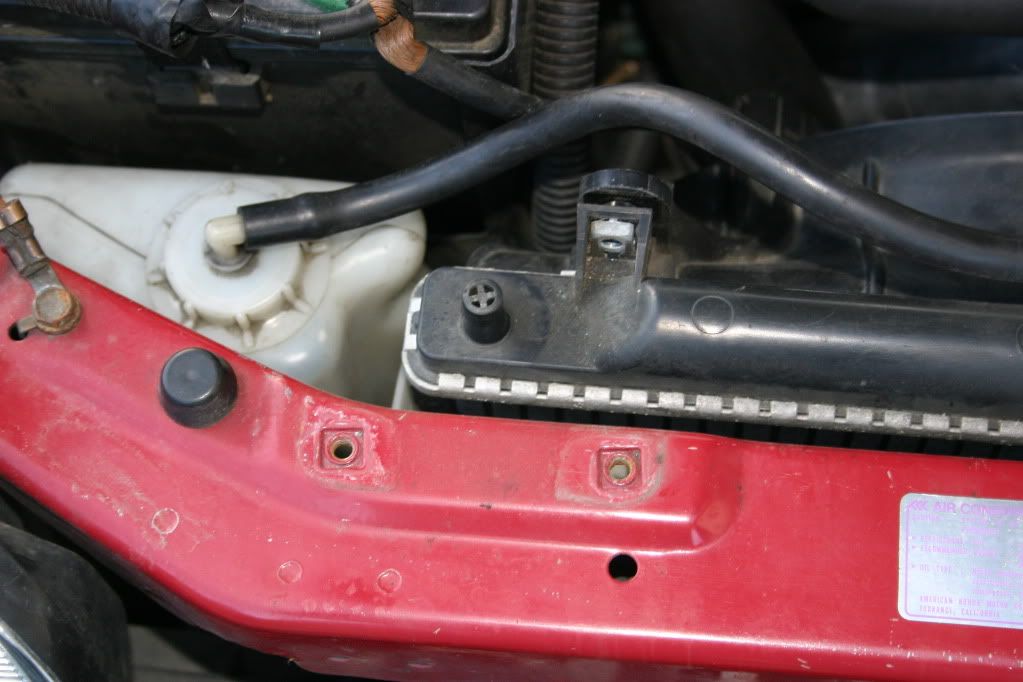
Now, here is my next issue. As you can see in the pre-install pic, my intercooler piping runs behind/on top of the ratiador

not gonna work anymore...


sticks up over the fender a bit... the hood obvious wont close like this

SOlution? lower the radiator!

by modifying these little buggers. without making them so short that they allow metal to metal contact of course

now if that doesnt work, I'm going to weld up a pipe that goes around all that stuff
So that's where I stopped for the evening. As you can see it was getting dark fast as I was working on the car lol
In return for an unfinished install, here are some pics of my quick turbo inspection while I had everything out of the way! everyone likes turbo pics!
Pulled out my turbo intake and removed the airfilter. AEM Dryflow FTW! no oiling, just wash with water!

ewwww look what came out of it...

And a quick compressor wheel check. minimal shaft plan, no oil leakage, good to go!

The End for now!
No comments:
Post a Comment